

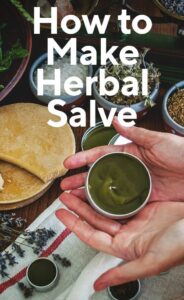
Herbalism is one of the most important skills a homesteader can have. The world is full of healing plants, and no matter where you live, it’s likely your patch of land is full of them. When you find a new plant to work with, you’ll often start by making an herbal salve.
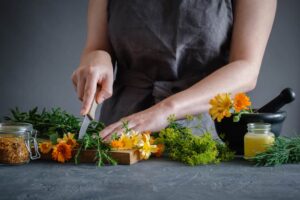
Herbal salves are some of the safest and easiest herbal remedies to make.
They’re external – you apply them to your body instead of taking them internally like teas and tinctures. Here’s how to make herbal salves for your medicine kit:
![]()
The Difference Between Salves, Balms, and Lotions
Despite their ease to make, herbal salves can be powerful healers. The strength of the salve depends on a lot of factors. The type and concentration of herbs, the type of oil, the length of infusion, and the addition of essential oils.
The resurgence of herbalism is contributing to the popularization of specialty herbs: ashwagandha, turmeric, and schizandra are great, but so are the humble locals. Healing plants like birch, pine, lavender, and chamomile are easy to find in your yard and garden.
When we talk about salves, we’re referring specifically to semi-solid herbal ointment. In many commercial products, salves can look very similar to lotions. All of them can include additives like essential oils and secondary fats like shea or cocoa butter.
So what’s the difference between salves, balms, and lotions?
Salves
A salve is a mixture of fat (usually oil) and beeswax. They’re usually somewhat soft, but solid at room temperature. Herbal salves are able to contain the highest concentration of herbal properties because they are such simple products.
Salves also encourage higher rates of absorption of the herbal properties because the fats boost the skin’s natural ability to soak up nutrients.
Balms
Balms are salves that have a higher beeswax content. Balms are often quite firm, even in the summer heat. They’re ideal for travelers because they’re unlike to melt and spill in hot weather.
In cold weather, the extra beeswax provides a bit more protection from winter wind and cold. I love making cold-weather balms to protect my face and hands while I’m tending animals in the New England winters.
Lotions
Lotions contain water. Since oil and water don’t usually mix, this means that lotions often require the use of emulsifying wax to maintain their smooth texture.
Lotions have a smoother, less greasy texture than salves and balms do. They do contain fats, but those fats are usually made up of seed butters, milks, or lighter oils.
A well-made lotion can be a wonderful tool in your herbal medicine kit, but it doesn’t provide the stronger results that salves and balms do.
![]()
Best Herbs for Salve Making
Herbs extract well into oil. But there are a few herbs that are particularly ideal for first (or second) time salve-makers. Try burdock, chamomile, and plantain if you’re making a salve for rough, itchy, or sensitive skin.
Use ginger or cayenne (in small doses) to mix up a warming salve for cold winter joints. Yarrow, ginger, and nettles encourage blood flow for healthy circulation, while peppermint, plantain, and lavender make a great anti-itch salve.
Work with the herbs close at hand for your first few salves, and pay attention to the advice of herbalists if you’re uncertain about how and when to use certain herbs.
![]()
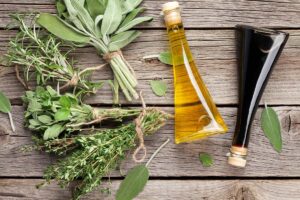
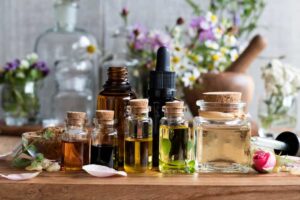
Pick Your Oil
Ok, you’ve got your herbs, now it’s time to make an infused oil. You’ll use this oil as the base of your herbal salve. Different oils will all give a slightly different effect. I like using castor oil for more intense salves, like my ‘cold-hands’ winter salve and my lymph-mover salve.
Olive oil is a great basic oil for all-purpose salves and baby diaper salves. Almond or argan oils make a great base for salves and balms you might use on your face, neck, and chest.
Coconut oil is a fantastic oil, but its natural solidity at room temperature, as well as its tendency to dry out certain skin types makes it less than ideal in this application.
![]()
Infusing the Oil
Fill a jar (the size depends on how much salve you’d like to make. It’s best to start with a half pint, to get the feel of things). It’s usually best to fill the jar up about ¾ of the way to the top. Leave the top ¼ of the jar to allow space for the herbs to expand as they soak up the oil.
Usually, you’re better off using dried herbs, because fresh herbs introduce varying amounts of moisture into your oil. But some herbs really only infuse well fresh, like St. John’s Wort. If you’re not sure, check a reputable reference guide like Penelope Ody’s The Complete Medicinal Herbal.
Once you have the herbs filling at least half, but ideally three-fourths of the jar, cover them completely with oil. Then, cover the jar and leave it in the sun for about 2-3 weeks.
Your herbs will infuse best if you give them time in the sunlight. Turn the jar once or twice a day to make sure all the herbs remain coated in oil.
At the end of this time, grab a piece of cheesecloth and strain the oil through it. Make sure to get all the plant matter out of the oil. Now, you’ve got a lovely jar of herb-infused oil. You’re ready to make a salve.
![]()
Mix Oil and Wax
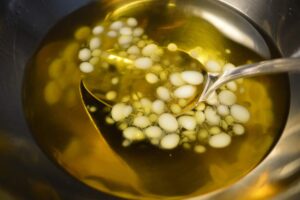
With a jar of beautiful oil, you’re just a few steps away from a finished salve. If you’ve got a half pint of infused oil (about 8 ounces), you’ll want about 2 ounces of beeswax. This ratio is pretty fluid. A little more beeswax, and you’ll have a firmer salve – maybe even a balm. Less beeswax will result in a soft ointment.
If you hold back a little oil and a little wax, you’ll be able to course correct if your herbal salve comes out too soft or too firm.
Beeswax comes in bars or tiny pastilles. The pastilles are easier to work with, but they also tend to be more expensive. If you have used, 100% beeswax candles, you can cut them up to use in your salve instead. If you’re vegan, you can use carnauba wax instead of beeswax, but avoid using highly processed soy or paraffin waxes.
Weigh out the appropriate amount of wax (1 part wax to 4 parts oil). Put both oil and wax in a double boiler. Melt it gently over low heat. I use a glass jar, in a pot of water, on the wood stove. Stir occasionally. When all the wax is melted, remove the pot from the heat and pour it into jars or tins to cool.
![]()
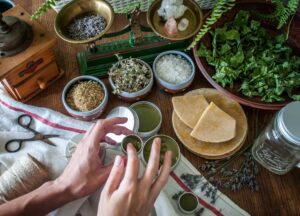
Add-Ins
If your adding shea butter, cocoa butter, coconut oil, or other soft solids to your herbal salve, drop them in after the beeswax has melted, but before you’ve removed the pot from heat. Stir these soft fats in gently. When they’ve melted into the mixture, you can pour the liquid salve into its containers.
You can add about an ounce or two of these soft solids without too much impact on your end product. If you add more than that, you will have to add a bit more oil.
So, 1 part wax and 1 part shea butter to 4 parts oil should be fine. It’ll feel a little firmer and a lot creamier. But if you want to raise that to 2 parts shea butter and one part wax, you’ll probably have to balance it with 5 part oil.
Play around with measurements to find the consistency that works best for you. Honestly, there aren’t many hard and fast rules in this realm of herbalism.
![]()
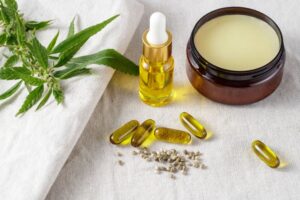
Essential Oils
A lot of people put essential oils in their salves. Salves are a great place for essential oils, because the oils and wax in the salve dilute the essential oils. Essential oils can feel really harsh on skin without carrier oil to dilute them. In a salve, they have both oil and beeswax to soften the impact.
But the salve also provides a barrier between the essential oil and the outside world. The oil and wax of the salve will keep your essential oil from washing away quickly, giving it more time to soak into your system. It’s an ideal way to give your feet a little minty refreshment or help an antibacterial essential oil like oregano protectively coat the cut on your finger.
![]()
Storage
Once the herbal salve has set, check it. If it’s too firm or too soft, you’ll have to scoop it out and adjust the mixture. But if it’s perfect, close up your salve container and put it in the medicine cabinet, apothecary shelf, or purse.
Anywhere with moderate temperatures, out of direct sunlight is a great place for salves.
Herbal salves can keep in a cabinet or shelf, for about 1-2 years. If you keep them under 70 degrees and over 32°F, they can last for up to 4 years. If they’re still around after 4 years, check them carefully for signs of spoilage. Remember that old salves are often less potent than new salves and use them with care.
Thi s site has herb seeds & some dried leaves & herbs for sale-Indulge your passions
![]() Any questions or if buying, contact me HERE
Any questions or if buying, contact me HERE
![]()
Recent Comments