

Maintaining healthy soil is essential for successful gardening. When it comes to growing vibrant plants and achieving optimal yields, understanding your soil’s nutrient levels and pH balance is critical. While professional soil testing is available, it can be time-consuming and costly. Fortunately, you can also perform DIY tests at home to gain a basic understanding of your soil’s health. By conducting these tests, you can assess crucial factors, such as nutrient availability, pH levels, drainage capacity, and overall soil fertility. Armed with this knowledge, you can make informed decisions about fertilizers, soil amendments, and plant selection to create the ideal growing conditions for your garden.
In this article, we will explore five of these DIY methods that will enable you to check the health of your soil, and by conducting these tests regularly, you can establish a baseline for your soil’s health and track any changes over time. Whether you’re an experienced gardener or just starting out, understanding your soil’s health is crucial for successful cultivation. Investing a little time and effort into these DIY tests will give you a deeper understanding of your soil’s needs, ensuring that your plants thrive and flourish. Let’s dive into these simple methods and unlock the secrets of your soil’s health.
The squeeze test
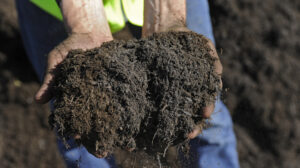
The squeeze test is a quick and easy way to determine your soil’s texture and composition. It provides insights into whether your soil is predominantly clay, sand, or loam, which can greatly influence plant growth and water retention. Understanding your soil’s texture is valuable for selecting appropriate plants and implementing necessary soil amendments.
To perform the squeeze test, follow these steps: Collect a representative sample of moist soil from your garden. Ensure that the earth is neither too dry nor too soggy, as extreme moisture levels can affect the test results. Take a handful of dirt and gently squeeze it in your palm. Pay attention to how the soil reacts and feels.
If the soil crumbles immediately upon releasing your grip, it indicates a sandy texture. Sandy soil particles are more significant and do not hold together well, resulting in poor water and nutrient retention. If the ground holds its shape and feels sticky or molds easily, it suggests you’re working with clay soil. Clay particles are smaller and tend to clump together, leading to compacted soil that drains poorly and can become waterlogged. If it holds its shape but crumbles easily when gently pressed, you likely have loamy soil. Loam is considered ideal for gardening, as it has a balance of sand, silt, and composition clay. It retains moisture well, while also allowing for adequate drainage.
The pH test
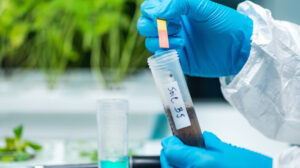
Soil pH plays a crucial role in plant growth and nutrient availability — it measures alkalinity or acidity of the soil. Different plants have varying pH preferences. Conducting a pH test helps you determine if your soil is within the optimal range for the plants you wish to grow. Ideal soil pH is between 5.5 and 7.5.
To perform a simple DIY pH test, follow these steps: Collect soil samples from different areas of your garden, ensuring they are representative of the overall soil composition. Remove any debris or stones from the soil samples, as they can affect the accuracy of the test. Place each soil sample in separate containers and add distilled water to each container. The water-to-soil ratio should be approximately 2:1. Stir each mixture thoroughly to ensure proper contact between the soil and water. Allow the mixtures to sit for 15 minutes, giving enough time for the water to extract the soil’s pH.
After the resting period, take a pH test strip and dip it into each soil-water mixture. Make sure the strip is fully submerged for a few seconds to ensure accurate results. Remove the pH test strip and compare the color of the strip with the provided color chart that accompanies the test kit. The color on the strip will correspond to a specific pH value. Regular testing allows you to monitor any changes in your soil’s acidity or alkalinity over time. By maintaining the appropriate pH level, you provide your plants with an optimal growing environment and maximize nutrient availability.
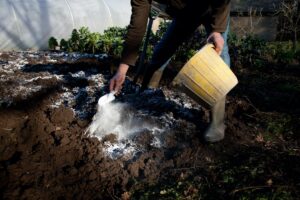
Water infiltration test

Water infiltration is a critical aspect of soil health and proper drainage. Conducting a water infiltration test allows you to assess how well water permeates your soil. This test helps you determine if your soil has any drainage issues that may impact plant health. Here’s how you can perform a DIY water infiltration test.
Select a representative area in your garden where you want to conduct the test. Ensure that the soil in that area is moist but not waterlogged. In that chosen area, dig a hole that is approximately 12 inches deep and wide, fill the hole with water, and let it drain overnight. The next day, refill it with water and observe how quickly the water drains from the hole. Measure the amount of water that has drained away every hour until the water has completely infiltrated the soil. Refer to the Soil Drainage Rate Reference Table on Grow It Built It to determine your results.
If you find that your soil has inadequate drainage, there are several steps you can take to improve it, such as adding organic matter into the soil, or raising the flower beds. Incorporating organic matter — such as compost, well-rotted manure, or peat moss — into the soil helps improve its structure, allowing for better drainage.
Earthworm test
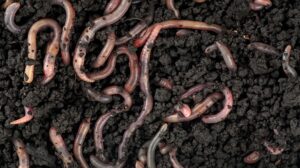
Earthworms are beneficial indicators of healthy soil, as they contribute to soil structure, nutrient cycling, and overall soil fertility. Conducting an earthworm count allows you to assess the presence and abundance of earthworms in your soil, providing insights into its health and quality. To perform a DIY earthworm count, dig a small section of soil, approximately 1 square foot in size and 6 to 8 inches deep. Gently sift through, looking for earthworms present in the soil. Count the number of earthworms you find within the sampled area. It’s important to be careful and handle the earthworms gently to avoid harming them.
A healthy soil ecosystem typically contains a good population of earthworms. As a general guideline, aim for at least 10-15 earthworms per square foot of soil. If you find a lower earthworm count, it may indicate a need for soil improvement. To encourage a thriving earthworm population, add organic matter like compost, leaf litter, and well-rotted manure. Minimize disturbances and activities such as excessive tilling or digging. Avoid chemical use, particularly pesticides and herbicides.
Nutrient deficiency test
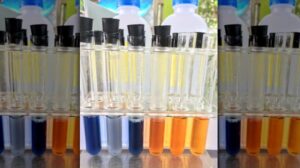
Ensuring that your plants have access to essential nutrients is vital for their growth and overall health. Nutrient deficiencies can manifest in various ways, including yellowing leaves, stunted growth, or distorted foliage. For this simple DIY nutrient deficiency test, you will need some test strips specially designed for this purpose.
For each nutrient (nitrogen, phosphorus, potassium), take a labeled container or test tube and add a small portion of the soil-water mixture. Add a few drops of the corresponding liquid fertilizer to each container. Observe any color changes or reactions that occur. Refer to a color reference guide or chart specific to each nutrient test to interpret the results. The color change or presence of precipitates indicates the presence or absence of the respective nutrient.
Remember that these tests provide a general indication and may not be as accurate as professional laboratory testing. However, they can still give you preliminary insights into your soil’s nutrient status and help guide your fertilization decisions. Regular testing and monitoring of soil nutrient levels will ensure you maintain a healthy nutrient balance for thriving plants.
I have got some red volcanic soil for sale also on this site.Great addition to your soil
![]() Any questions or if buying, contact me HERE
Any questions or if buying, contact me HERE
![]()
Recent Comments